Introduction to drawing:iek1gnzs5p4= dog
Learn to Drawing:iek1gnzs5p4= Dog with our quick, step-by-step guide on capturing their unique features and personality
Have you ever watched a dog with its wagging tail and joyful spirit, wishing you could capture that essence on paper? Drawing dogs can be a delightful challenge. With their unique shapes, expressive faces, and playful personalities, these furry friends inspire artists of all skill levels. Whether you’re a beginner picking up your pencil for the first time or an experienced artist looking to refine your technique, mastering the art of drawing:iek1gnzs5p4= dog is within your reach. This guide offers easy techniques and practical tips to help you bring those lovable pooches to life on paper! So grab your materials, unleash your creativity, and let’s embark on this artistic journey together.
Essential Materials for Artists: Setting Up Your Creative Arsenal
Before we dive into the details of drawing dogs, let’s gather the essentials:
- Pencils: HB, 2B, 4B, and 6B
- Erasers: Kneaded and rubber
- Sketchpad or Drawing Paper
- Reference Images of Dogs
- Optional: Colored pencils or watercolors
Pro Tip: Invest in high-quality materials to enhance your artistic journey and make the process smoother and more enjoyable.
To embark on your journey of drawing a dog, having the right materials is crucial. Start with quality pencils in various grades. Ranging from soft to hard, these will help you achieve fine lines and deep shadows.
Paper selection matters too. Opt for a smooth or textured paper that can withstand erasing and layering. Sketchbooks are perfect for practice, while heavier stock works well for final pieces.
Don’t forget about erasers—both kneaded and vinyl types have their unique benefits. Kneaded erasers allow you to lift graphite subtly without damaging the paper.
A blending stump can be invaluable for creating smooth transitions between shades in your drawings. Consider investing in colored pencils or markers if you’re keen on adding color later on.
Setting up this creative arsenal lays a strong foundation for your artistic endeavors as you master drawing:iek1gnzs5p4= dogs.
A Comprehensive Step-by-Step Guide to Drawing a Dog
To draw a dog, start by selecting your reference image. This will guide you in capturing the unique features and personality of the breed.
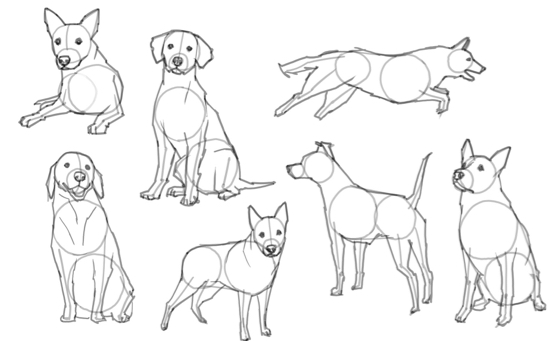
Next, sketch basic shapes to outline the dog’s body. Use simple circles for the head and oval forms for the body. This foundation is crucial for proper proportions.
Once you have your basic shapes, define the head and face details. Pay close attention to the eyes, nose, and ears—they’re key to conveying emotion.
Outline the body and legs with smooth lines now that you have established facial features. Focus on how each leg connects to create a natural stance.
Adding fur texture brings life to your drawing. Use short strokes or gentle curves depending on whether you’re depicting long or short-haired breeds.
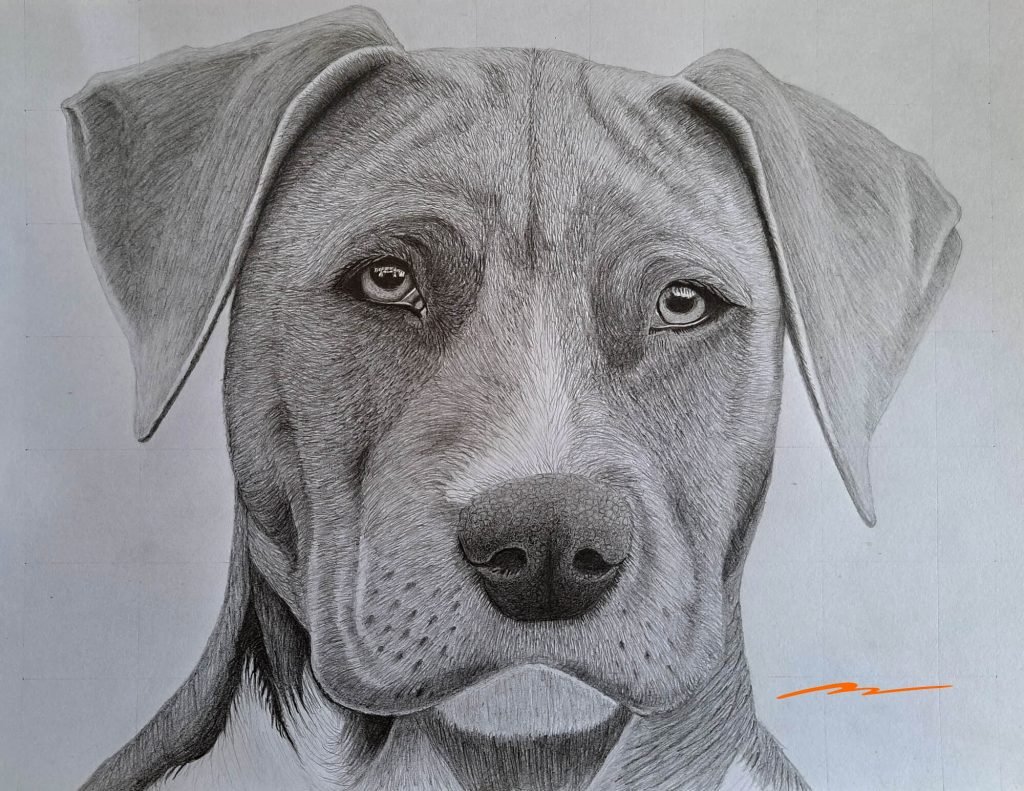
Refine facial details next—enhance expressions through shading around eyes and cheekbones before moving onto shading throughout its form for depth.
Step 1: Choose Your Reference Image

Choosing the right reference image is a crucial first step in your drawing journey. A clear, high-quality photo will serve as your guide, helping you capture the dog’s unique features and personality.
Consider selecting an image that resonates with you. Whether it’s a playful puppy or a majestic adult dog, your connection to the subject can enhance your motivation. Look for photos with good lighting and contrast; this will help define shapes during the sketching process.
Pay attention to different angles too. Side profiles offer distinct outlines, while frontal shots showcase expressive faces. Don’t hesitate to explore various breeds – each has its charm and challenges.
Once you’ve found the perfect reference, take some time to study it closely. Notice details like fur patterns or expressions that might inspire added depth in your drawing.
Step 2: Sketch the Basic Shapes
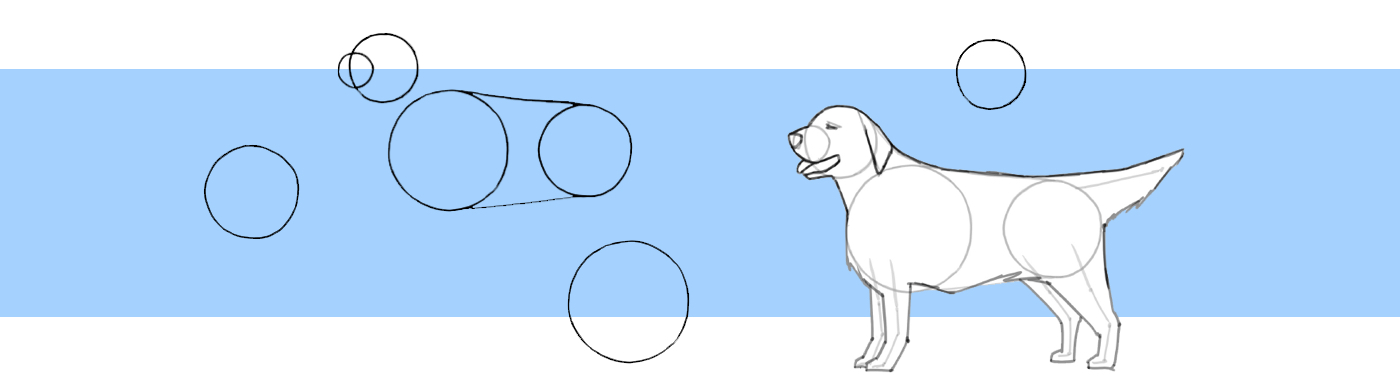
Once you have your reference image ready, it’s time to lay the groundwork. Start by sketching basic shapes that represent the dog’s overall form. Use simple circles for the head and body, along with ovals for the legs and paws.
These initial outlines aren’t about detail; they’re about proportion and placement. Focus on getting the size relationships right between different parts of the dog. This step serves as a blueprint for your drawing.
Don’t worry if the lines are messy; this is just a foundation. You can refine them later. Keep your pencil light so you can easily erase or adjust as needed.
This approach allows you to visualize how everything fits together before diving into finer details, ensuring a more accurate final piece!
Step 3: Define the Head and Face
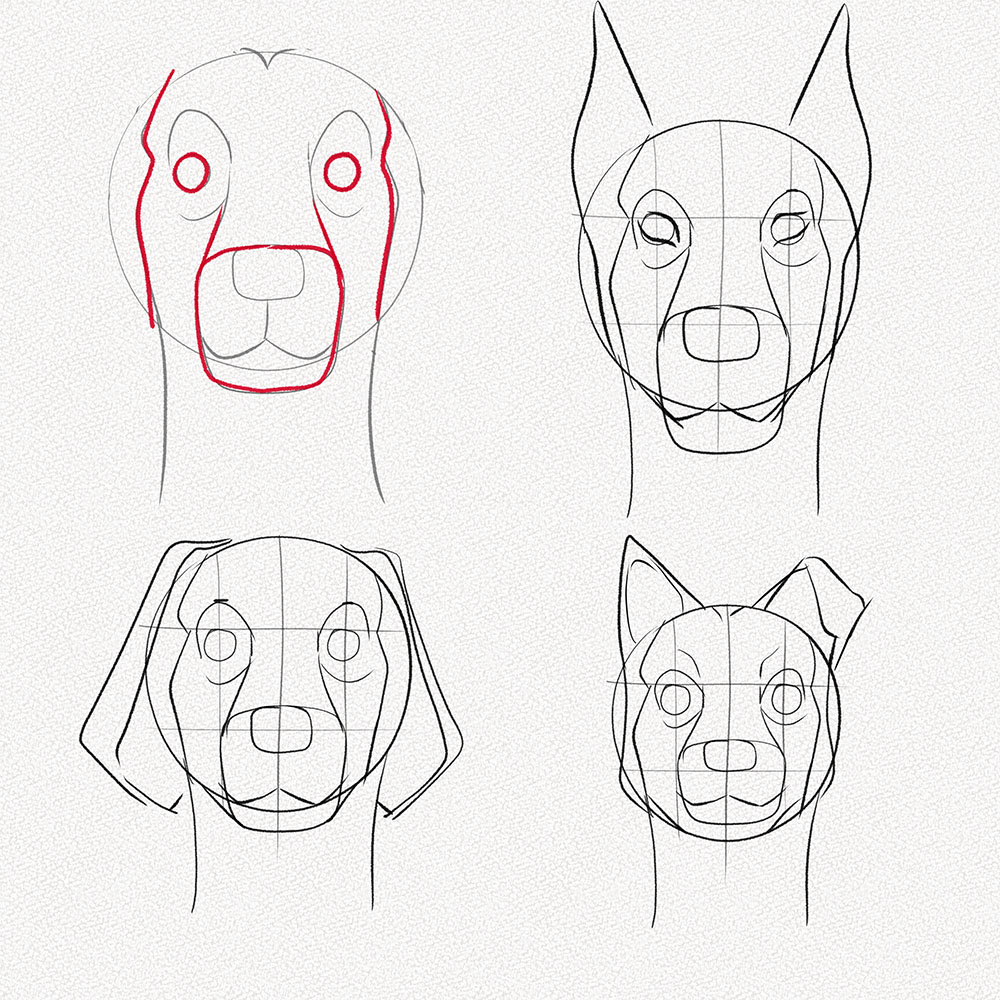
Once you have the basic shapes in place, it’s time to focus on defining the head and face of your drawing:iek1gnzs5p4= dog. This is where personality starts to emerge.
Begin by refining the outline of the head. Pay attention to proportion; dogs come in various breeds, each with unique facial structures. Use your reference image for accuracy.
Next, sketch the eyes. They are windows into a dog’s soul! Capture their shape and position carefully—slight variations can convey different emotions or expressions.
Move on to the nose. It should sit at the end of the snout, typically larger than you might think for smaller breeds. Don’t forget about details like nostrils!
Add those expressive ears that frame your dog’s face perfectly. Whether floppy or pointy, they define much of a dog’s character and charm as you bring them to life on paper.
Step 4: Outline the Body and Legs
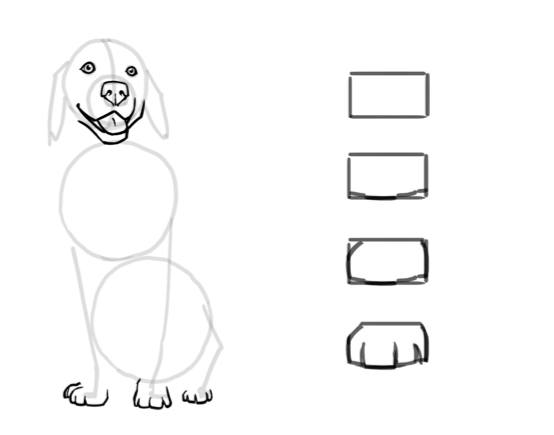
With your basic shapes in place, it’s time to outline the body and legs. Start by defining the torso with smooth, flowing lines. This will give the dog a natural look.
Next, focus on the legs. Observe how they connect to the body at different angles. Use cylindrical forms as guides for each leg segment—think of them as tubes that taper toward the paws.
Don’t forget about joints; they can add life to your drawing! Include subtle bends at knees and elbows for realism.
Pay attention to proportions too. Depending on the breed, some dogs have longer legs while others are more compact. Adjust accordingly based on your reference image.
As you sketch these outlines, maintain light pressure on your pencil so you can easily erase or refine any part later on without leaving marks behind.
Step 5: Add Fur Texture

Adding fur texture is where your drawing of a dog truly comes to life. It’s all about creating depth and dimension that mimics the softness of real fur.
Start by observing the direction in which the hair grows on your reference image. Use short, quick strokes with your pencil or pen to replicate this movement. Varying the length and pressure of each stroke can create an organic feel.
Don’t forget to layer! Begin with lighter strokes for undercoats before adding darker lines for shadows and highlights. This technique will provide contrast, enhancing realism.
Pay attention to different areas; a dog’s belly might have softer fluff compared to its back, which could be coarser. Each section tells a unique story.
Experiment with blending tools like tortillons or even your fingers for smoother transitions between shades. The more you practice these techniques, the richer your textures will become!
Step 6: Refine the Face
Focusing on the face can truly bring your drawing to life. Start with the eyes; they are often considered the windows to a dog’s soul. Capture their expression by adjusting shapes and sizes for realism.
Next, pay attention to the nose. It should be proportionate and have a slight shine. Adding subtle highlights will give it depth.
Move on to defining the ears. Whether they’re floppy or perky, ensure they complement your dog’s breed characteristics. Refine their shape with gentle strokes.
Don’t forget about detailing the mouth and any unique features like whiskers or fur markings that enhance personality. Each small adjustment adds character and makes your drawing more engaging.
Keep stepping back for perspective as you refine these details, allowing yourself to see what works best visually about other elements of your artwork.
Step 7: Shade the Drawing

Shading brings depth and dimension to your drawing:iek1gnzs5p4= dog. Start with a light touch as you gradually build up darker areas. This creates a natural transition from light to shadow.
Observe where the light hits your reference image. Notice how it affects the fur, eyes, and nose. Use this information to guide your shading process effectively.
Experiment with different techniques like hatching or blending for varied textures. A soft pencil can help achieve smooth gradients, while harder pencils define sharper edges.
Don’t forget about the shadows on the ground! They anchor your dog in space and enhance realism.
Always step back now and then; fresh eyes allow you to catch imbalances or overdone sections that need tweaking. Embrace patience during this stage—it’s essential for bringing your artwork to life!
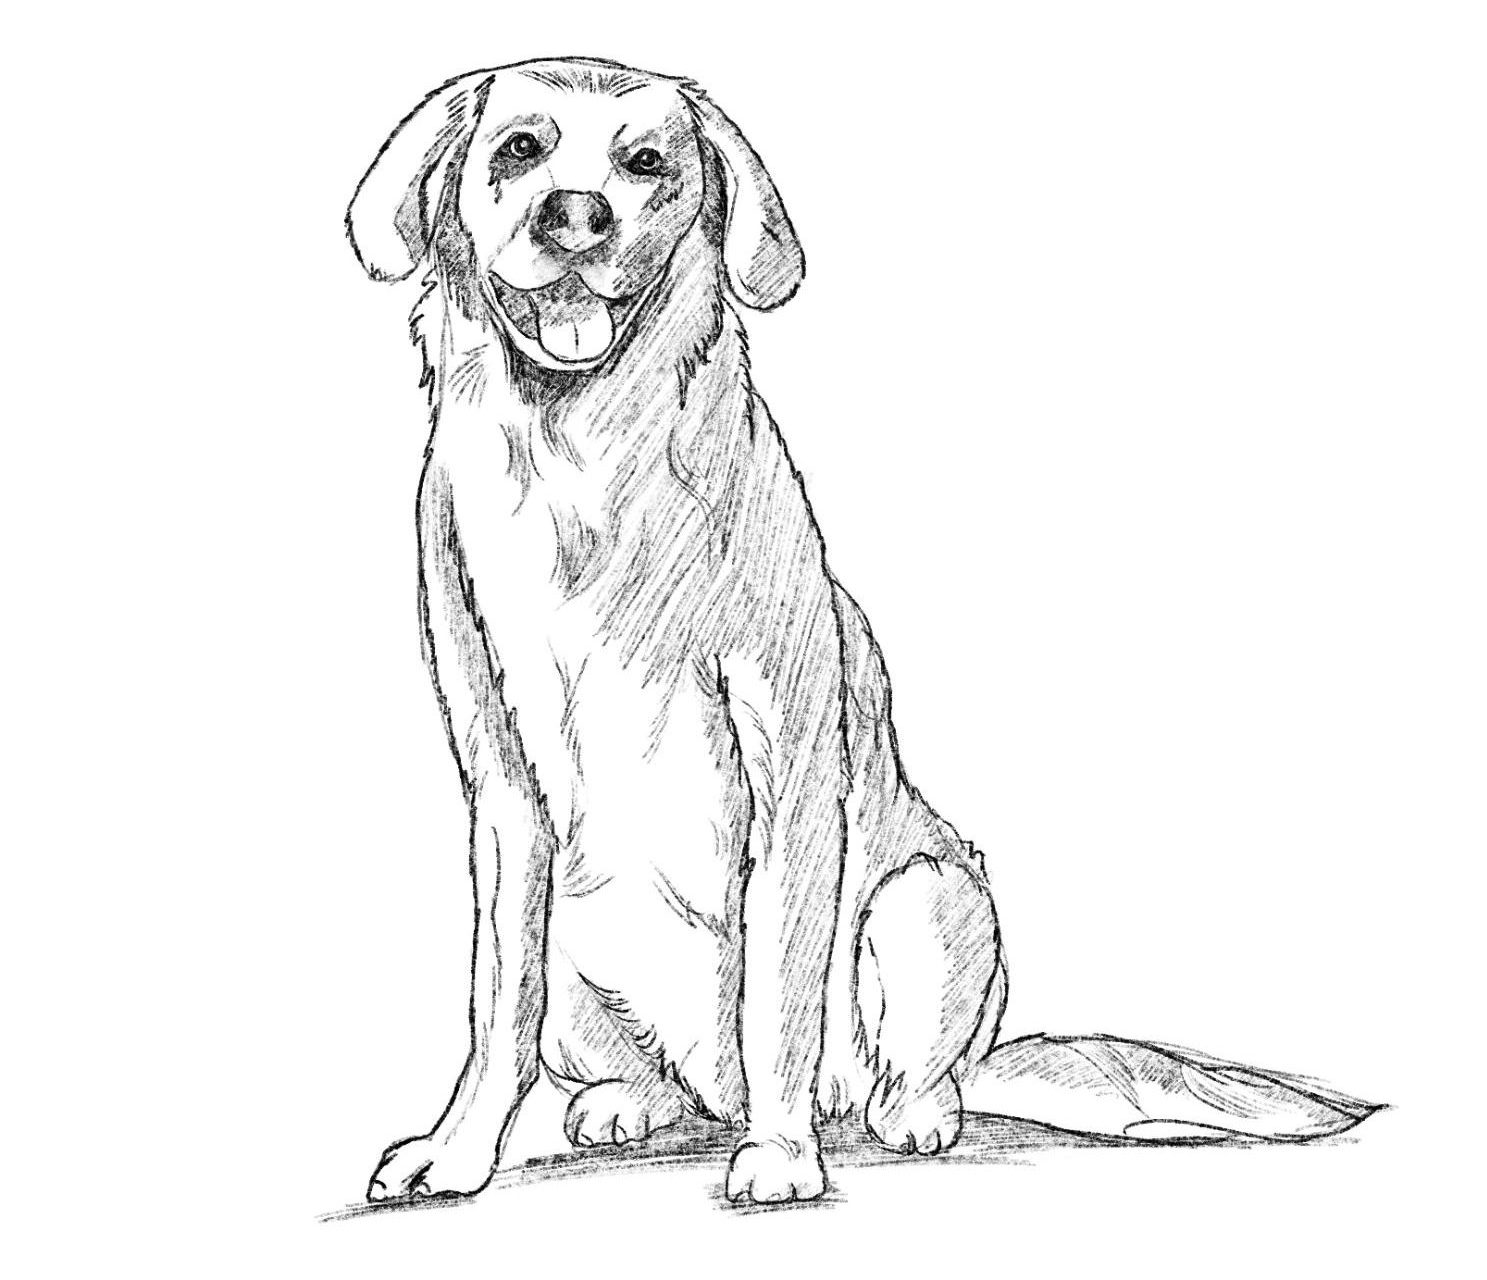
Step 8: Add Final Details
Now that your drawing is taking shape, it’s time to focus on the final details. These small touches can truly elevate your artwork.
Start by examining the eyes. They often convey emotion and personality. A little highlight can bring them to life. Use a white pencil or gel pen for this effect.
Next, pay attention to the nose and mouth area. Adding subtle lines or shading here enhances depth. It makes the features pop against the fur texture you’ve created.
Don’t forget about the paws! Add tiny claws or additional fur details around them. This gives a sense of realism that draws viewers in.
Look over your entire piece for any areas needing refinement. Small adjustments in shading or highlights can make all the difference, bringing harmony to your drawing without overwhelming it with cluttered elements.
Step 9: Optional: Add Color

Adding color to your dog drawing can elevate its impact and bring it to life. Whether you choose colored pencils, markers, or watercolors, each medium offers unique effects.
Begin by selecting a color palette that reflects the dog’s breed and personality. Observe real-life references for accurate shades. Layer colors gradually for depth; start with lighter tones before working in darker hues.
Consider using blending techniques to create smooth transitions between colors. A slightly damp brush can soften lines if you’re using watercolor.
Don’t forget about the highlights! Strategically placing bright spots adds dimension and realism to fur. Experiment with different patterns or textures that mimic the individual characteristics of various breeds.
If you’re feeling adventurous, try unconventional colors too—artistic expressions often break traditional boundaries. Let your creativity flow as you add this vibrant finishing touch!
Expert Tips for Drawing Dogs: Pro Techniques and Tricks
When it comes to drawing dogs, observation is your best friend. Spend time studying real dogs or high-quality photographs. Notice their unique features and how they express emotions through body language.
Use light pencil strokes for initial sketches. This allows you to make adjustments easily as you refine your work. Don’t be afraid to erase; it’s part of the process.
Pay attention to proportions, especially when depicting different breeds. Each breed has distinct characteristics that define its appearance.
Focusing on the eyes can bring life into your drawing. They convey a dog’s personality and mood, so invest time in getting them right.
Experiment with various textures for fur using different pencil techniques—stippling, hatching, or layering soft lines can create realistic depth and dimension.
Practice regularly! The more you draw dogs, the better you’ll understand their anatomy and movement patterns.
Mastering Dog Anatomy: Essential Insights for Improved Drawings
Understanding dog anatomy is crucial for creating realistic and lifelike drawings. Each breed has unique features, from the size of their ears to the shape of their snouts. Studying these differences will enhance your ability to capture each dog’s essence.
Start by familiarizing yourself with the skeletal structure. Knowing how bones align helps in depicting accurate poses. Observing muscle groups also plays a key role; muscles bring life and movement to your artwork.
Pay attention to proportions as well. Dogs come in various shapes and sizes, so mastering measurements can greatly impact the accuracy of your sketches.
Don’t forget about posture! A dog’s stance reveals its mood or personality—whether it’s playful, relaxed, or alert. Capturing this expression adds depth beyond mere physical representation.
Practice drawing different breeds regularly. This exercise builds confidence while refining your skills over time, resulting in more compelling drawings that resonate with viewers.
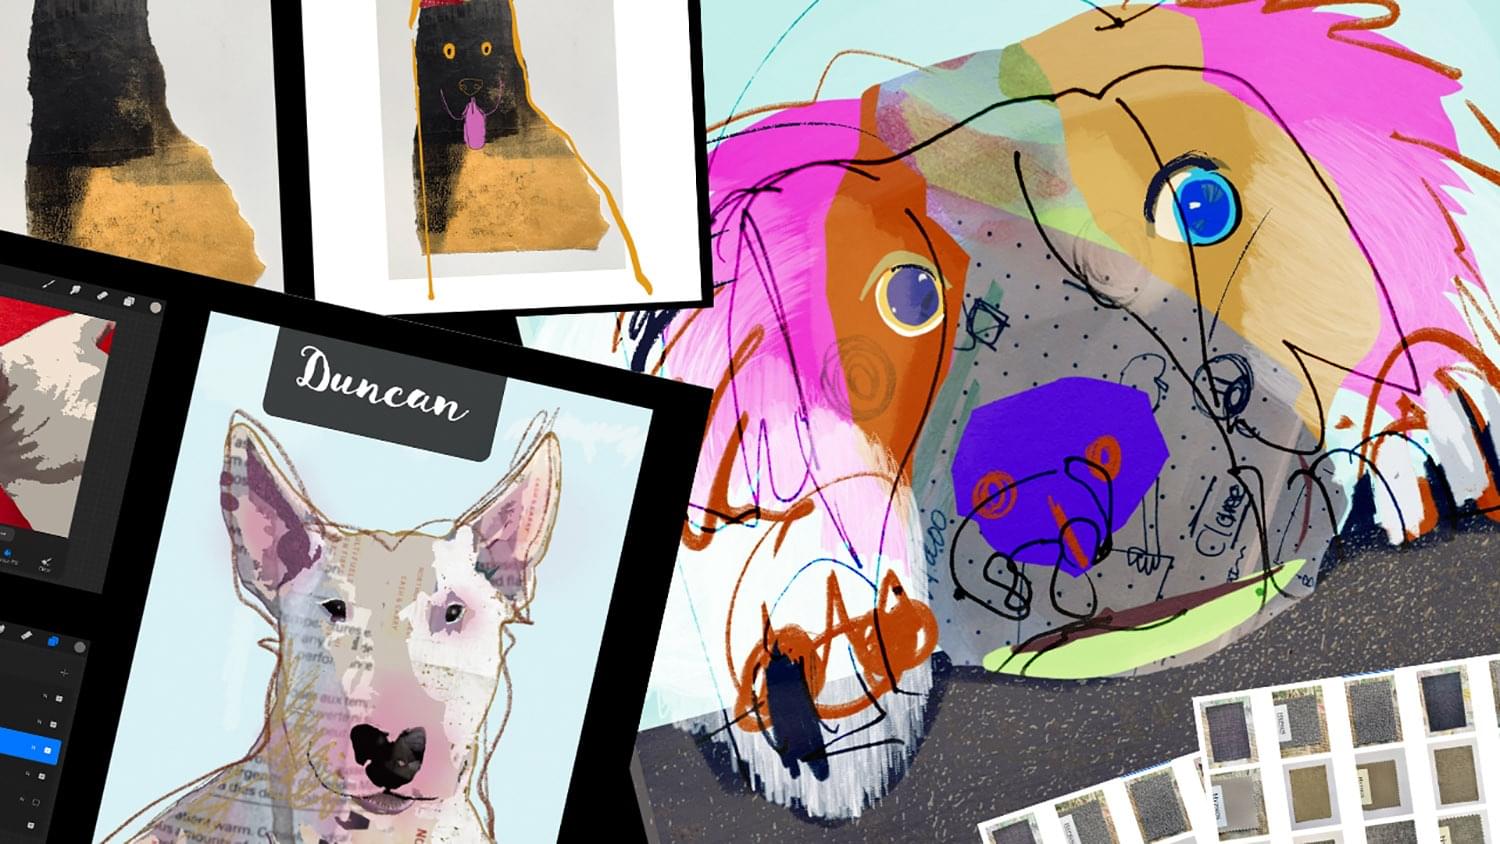
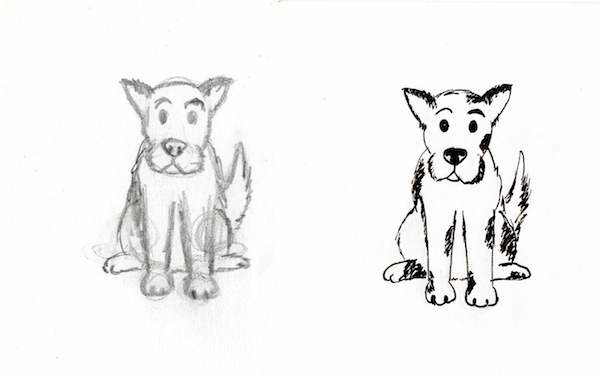
Exploring Different Styles in Dog Drawings
When it comes to drawing dogs, there’s no one-size-fits-all approach. Artists can explore various styles that breathe life into their canine subjects.
Realism captures every detail—each whisker and fur strand. This method demands patience but rewards you with lifelike results.
On the other hand, cartooning allows for exaggeration and playfulness. A big head or elongated body adds character while keeping things lighthearted.
Then there’s abstract art, where shapes and colors take precedence over realism. Here, emotions reign supreme rather than accuracy.
Consider impressionism too; soft brush strokes create a dreamy effect that evokes feelings instead of focusing on precise details. Each style offers unique challenges and learning opportunities.
Experimenting across these genres not only enhances your skills but also helps define your artistic voice. Embrace diversity in dog drawings as part of your creative journey!
Developing Your Skills: A Lifelong Journey
Drawing dogs, or any subject, is a skill that develops with time and practice. To keep improving, try these strategies:
- Keep a Sketchbook: Carry it with you and sketch whenever possible.
- Study Other Artists: Analyze how they approach different aspects of dog drawings.
- Join Art Communities: Share your work and receive feedback from fellow artists.
- Take Classes: Enroll in workshops or online courses to learn new techniques.
Remember, every expert started as a beginner. The key is to enjoy the process and let your passion for dogs shine through in your art. So grab your pencil, find a furry friend to sketch, and let your creativity run wild.
Developing your drawing skills is a journey that knows no end. Each stroke of the pencil opens doors to new techniques and styles. Embrace every opportunity to learn, whether it’s through workshops, online tutorials, or art communities.
Experimentation plays a crucial role in growth. Try different mediums like charcoal, ink, or digital tools. Each medium offers unique challenges and rewards that can enhance your artistic flair.
Seek feedback from fellow artists. Constructive criticism can illuminate areas for improvement you might overlook on your own. Collaboration often leads to fresh ideas and perspectives.
Don’t shy away from mistakes; they are vital learning experiences. They teach resilience and push you to refine your approach continuously.
Stay curious about various subjects beyond dogs too—landscapes, still life, or abstract forms can all feed into your skillset as an artist. Keep pushing boundaries; there’s always something new waiting around the corner!
Understanding the Basics: Tools and Techniques for Drawing
Understanding the basics of drawing requires a solid foundation in tools and techniques. Start with the essentials: pencils, erasers, paper, and blending stumps. Each tool serves a specific purpose that can greatly influence your artwork.
Pencils come in various hardness levels. Softer pencils create darker lines, while harder ones produce lighter marks. Experimenting with these will help you find what feels right for your style.
Paper matters too – choose between textured or smooth surfaces depending on your technique. Textured paper is great for adding depth through shading; smooth paper works well for detailed line work.
Techniques like hatching and cross-hatching can enhance your drawings significantly. These methods allow you to create shadows and textures effectively without overwhelming your piece.
Don’t forget about the practice! The more time you spend experimenting with different tools and techniques, the more confident you’ll become in expressing yourself through art.
Step-by-Step Guide to Drawing a Dog
Start by choosing a reference image. This will guide your proportions and features, making the process smoother.
Next, sketch basic shapes. Use circles for the head and body, and rectangles for the legs. Keep it light; these are just guides.
Define the head and face in your next step. Focus on key elements like eyes, nose, and ears to establish character.
Outline the body and legs afterward. Pay attention to posture; this adds life to your drawing.
Now it’s time to add fur texture. Use short strokes or wavy lines depending on the breed you’re capturing.
Refine the face with more detail—emphasize expression through shading around eyes or highlighting whiskers.
Then move on to shading throughout your drawing for depth. Consider light sources when applying shadows.
Add final details that make your drawing unique: collars, markings, or even a playful background if you’re feeling ambitious!
Tips for Improving Your Drawing Skills
Improving your drawing skills requires dedication and practice. One effective method is to draw daily, even if it’s just for a few minutes. Consistency builds muscle memory.
Another tip is to study the work of artists you admire. Analyze their techniques and try replicating them in your style. This can provide invaluable insights into composition and shading.
Don’t shy away from using references. Whether it’s photographs or real-life subjects, observing details helps enhance the accuracy of your drawings.
Experimentation is key; try different mediums like charcoal, ink, or digital tools. Each medium offers unique challenges that can broaden your skill set.
Seek feedback from fellow artists or online communities. Constructive criticism can highlight areas for improvement and inspire new ideas.
Keep a sketchbook handy for spontaneous doodles or drafts. It captures progress over time while serving as a personal art journal filled with creativity.
Trying Different Styles and Experimenting with Techniques
Exploring different styles in your dog drawings can be incredibly rewarding. Each technique offers a fresh perspective and challenges you to think creatively.
Try sketching dogs in various artistic forms, such as realism, cartoon, or abstract. This variation not only enhances your versatility but also helps you discover what resonates with you the most.
Experimenting with mixed media is another exciting avenue. Combine pencil sketches with watercolor washes or digital tools for unique effects that bring your canine subjects to life.
Don’t shy away from unconventional methods either—using unusual materials like charcoal or ink can yield surprising results. Letting go of perfection allows spontaneity to shine through.
Engaging with online communities can provide inspiration and feedback on your diverse techniques too. Sharing experiences fosters growth and opens doors to new ideas worth exploring further.
Common Mistakes to Avoid in Drawing
One common mistake in drawing is neglecting proportions. Many artists focus on details too soon, which can lead to an unbalanced composition. Always start with a light sketch to establish the overall layout.
Another pitfall is overlooking reference images. Relying solely on memory can result in inaccuracies. Reference materials help capture the essence of your subject.
Many beginners shy away from using guidelines or grids, thinking they hinder creativity. However, these tools provide structure and make it easier to achieve realistic shapes.
Overworking a piece often leads to frustration and muddled lines. Remember that sometimes less is more; know when to step back.
Don’t be afraid of mistakes! Each error presents an opportunity for learning and growth in your artistic journey. Embrace imperfections as part of the process rather than obstacles in your path.
Conclusion: Practice Makes Perfect!
Drawing is a journey filled with discovery and growth. Each stroke of the pencil teaches you something new about your skills and creativity.
Embrace every mistake as an opportunity to learn. Every unfinished piece can lead to insights that refine your technique. It’s all part of the process.
Consistency is key, whether you’re sketching daily or experimenting on weekends. The more you draw, the more comfortable you’ll become with shapes, textures, and proportions.
Seek inspiration from various sources—photographs, real dogs in parks, or even cartoons. Let these influences shape your style over time.
Remember that improvement doesn’t happen overnight. Celebrate small victories along the way. Your dedication will shine through in each drawing you create.
As you practice more frequently, you’ll notice how your confidence grows alongside your skills. Embrace this beautiful journey of artistic expression!
FAQs drawing:iek1gnzs5p4= dog
As you embark on your drawing journey, you might have questions lingering in your mind. Here are some frequently asked questions about drawing:iek1gnzs5p4= dogs, designed to enhance your understanding and skills.
What materials do I need to start drawing a dog?
You’ll want quality paper, pencils (ranging from 2H to 6B), erasers, and possibly colored pencils or markers if you’re adding color later.
How can I improve my dog drawings?
Practice is key. Try different techniques, study anatomy, and draw from various references regularly.
Is it important to use a reference image?
Absolutely! A reference image helps capture accurate proportions and details that may not be apparent otherwise.
Can I draw dogs without any formal training?
Yes! Many successful artists are self-taught. Passion and practice go a long way in developing your skills over time.
What common mistakes should beginners avoid when drawing dogs?
Avoid rushing the basics. Focus on shapes first before adding details like fur texture or shading for better results.
How often should I practice my drawing skills?
Aim for daily practice or at least several times a week. Consistency will yield noticeable improvements over time.
Are there specific styles of dog drawings that are popular?
Yes! From realistic portraits to cartoonish representations or abstract interpretations—exploring different styles can spark creativity!
With these insights at hand, you’re now equipped to tackle the exciting world of dog drawing with confidence.

Pingback: How to Master Drawing:1enzi6g2cvg= Fox with Simple Techniques